


UIFlow Guide
UIFlow 1.0 Quick Start
2. Firmware & Program 1.0
UIFlow 1.0 Blockly
Event
UI
Modules
Unit
HAT
UIFlow 1.0 Project
UIFlow 2.0 Quick Start
2. Firmware & Program 2.0
Desktop IDE
UIFlow 1.0 File Management
UIFlow 1.0 provides a file management feature, offering a unified and convenient platform for developers to handle and manage various project files.
File Management System
The file management system is divided into USB mode and WiFi mode, with the following differences:
- After connecting the device to UIFlow 1.0, USB mode can only access files stored in the device, while WiFi mode can access files saved in the cloud as well as the device.
- WiFi mode enables remote downloading of programs and files to the device.
USB Mode Resource Reference
Before connecting the device to UIFlow 1.0 via USB, you need to switch the device's connection mode to USB mode. Method: After the device is powered on, select the Flow setting from the device interface options of App/Flow/Setup. Click the Flow setting, and a prompt choose mode(will reboot) will appear on the device's interface. Select USB mode to switch to USB mode.
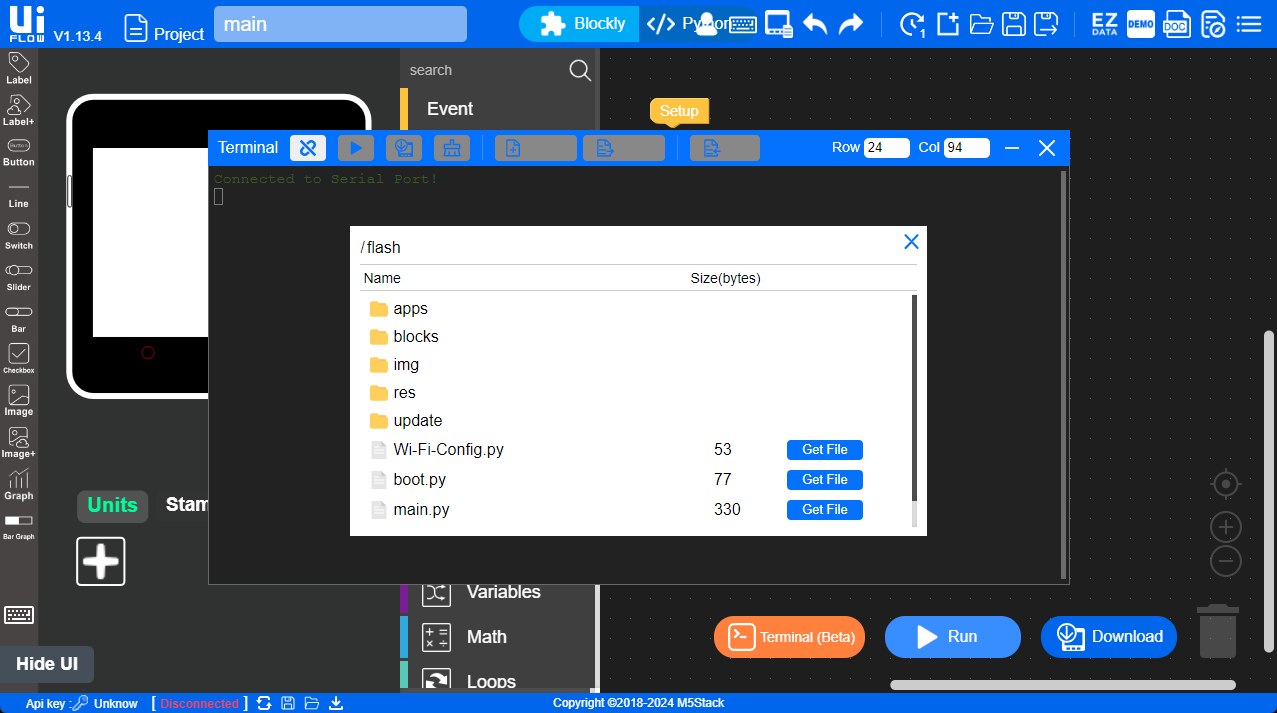
1. Connecting the Device
Connect the device to the computer via a USB cable, click the Terminal(Beta) button, and after successful connection, click Get to open the file management system.


In the file management system, you can browse the files saved on the device. Click Select to choose the file you want to upload from your computer, then click Send to upload the file to the device. Click Get to download files from the device.
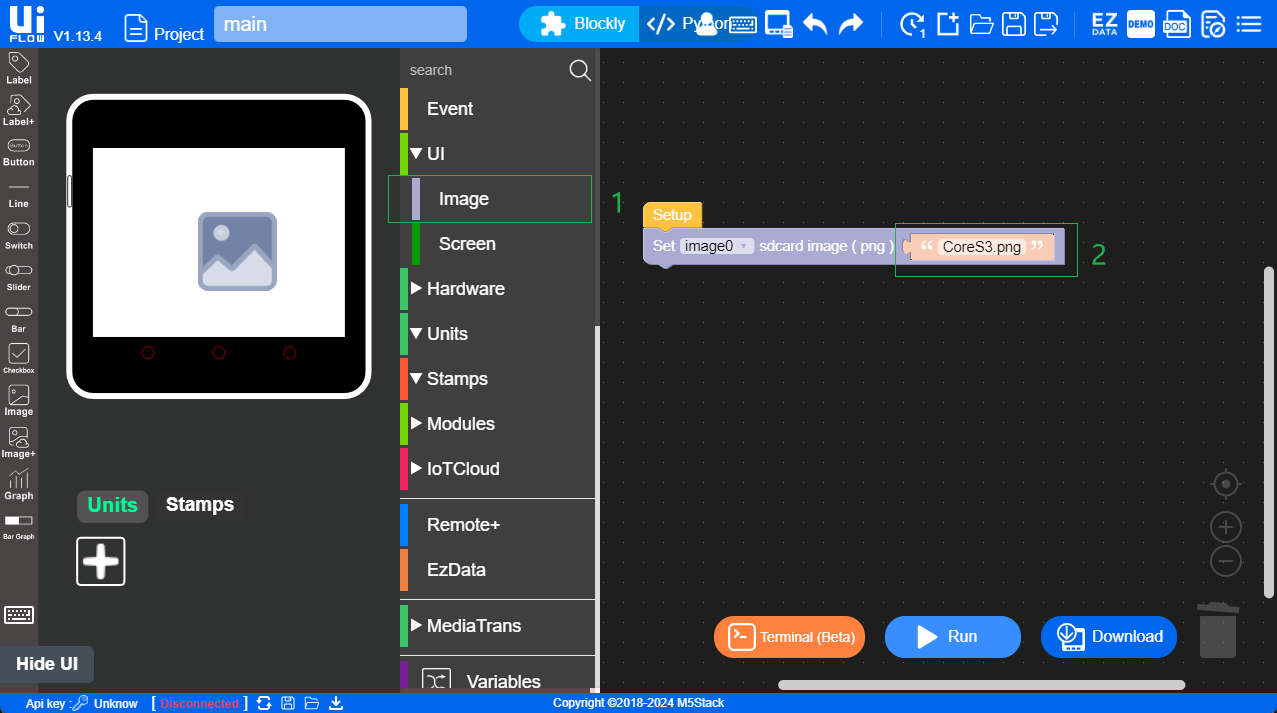
2. Introducing Images with Blocks
Drag the Image Block, fill in the image name and format, and click Run to preview the result. For example: CoreS3.png.
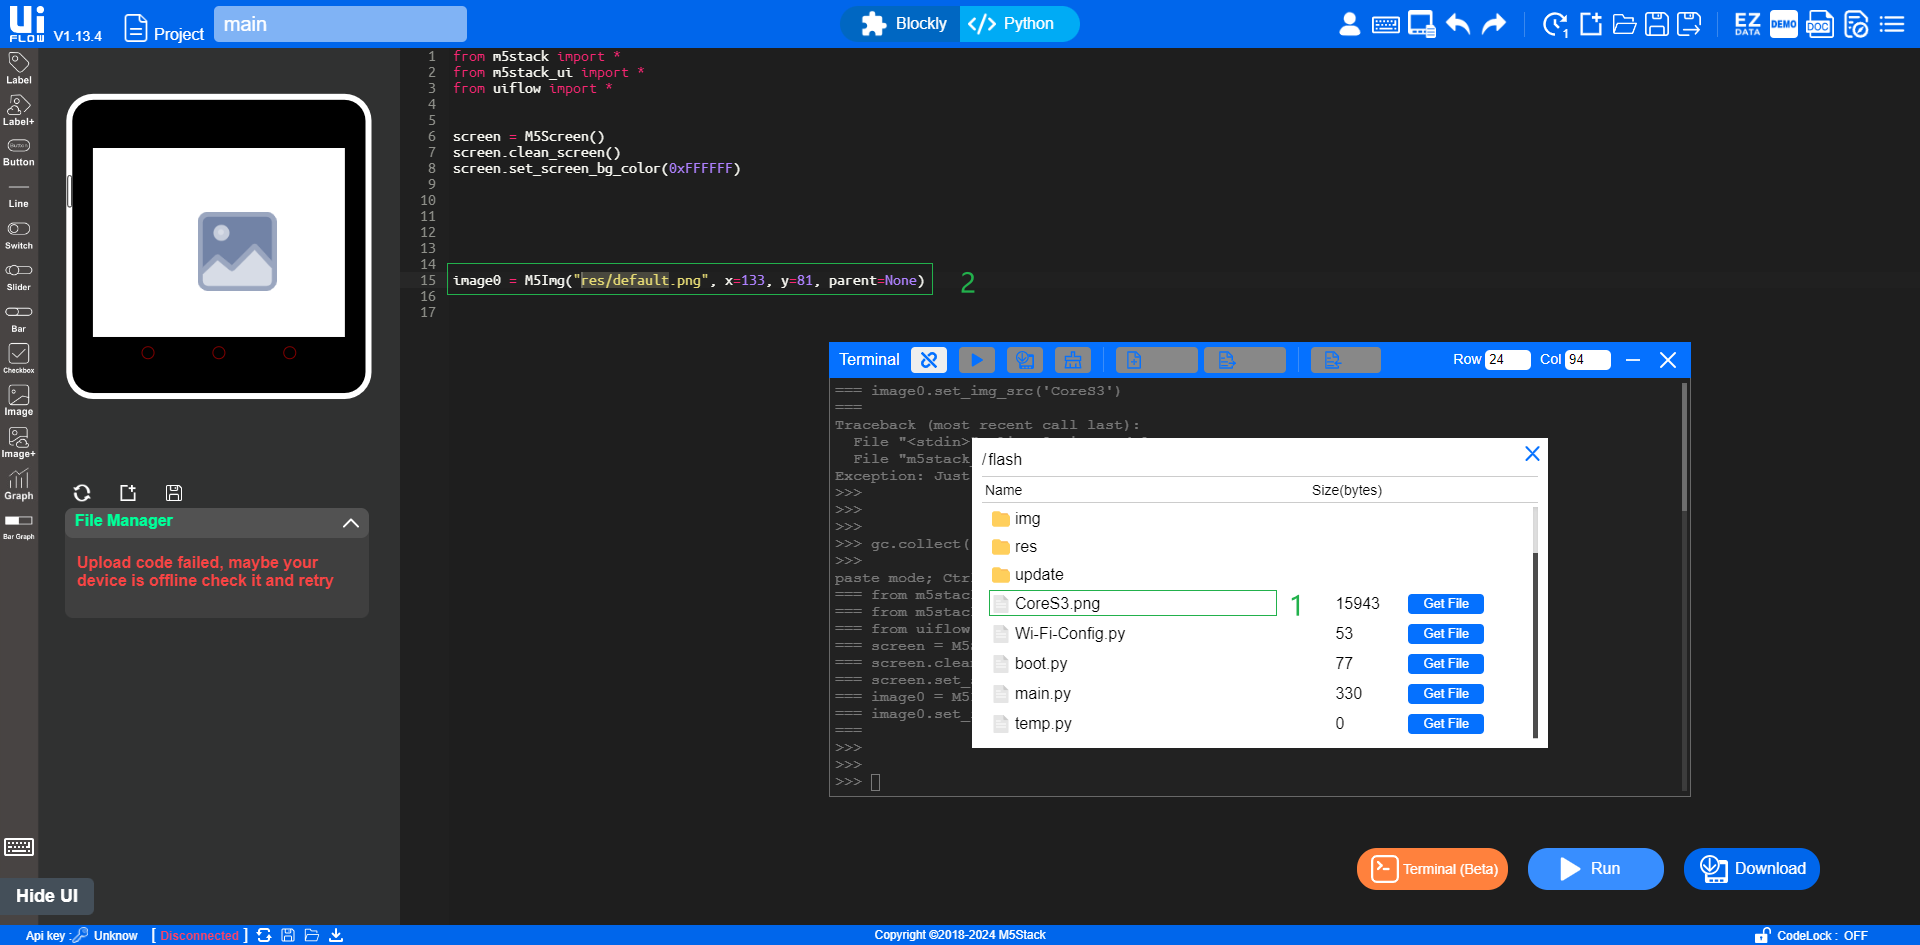
3. Introducing Images through Code
Find the default address for the image you want to modify and change it to the desired image. Open Terminal, click the play button (triangle) to preview the result. For example, if the address of the CoreS3.png image in the figure below is flash/CoreS3.png, modify the default image0 resource path and replace it with the image path of CoreS3.png.
WiFi Mode Resource Reference
Before connecting the device to the computer via WiFi, ensure that the device is powered on and connected to WiFi. Once the device is online, bind the device's API Key to the account to connect UIFlow 1.0 to the device. Drag an image UI component, and click on the Image Path within the image UI to introduce an image, allowing you to save and preview images online.
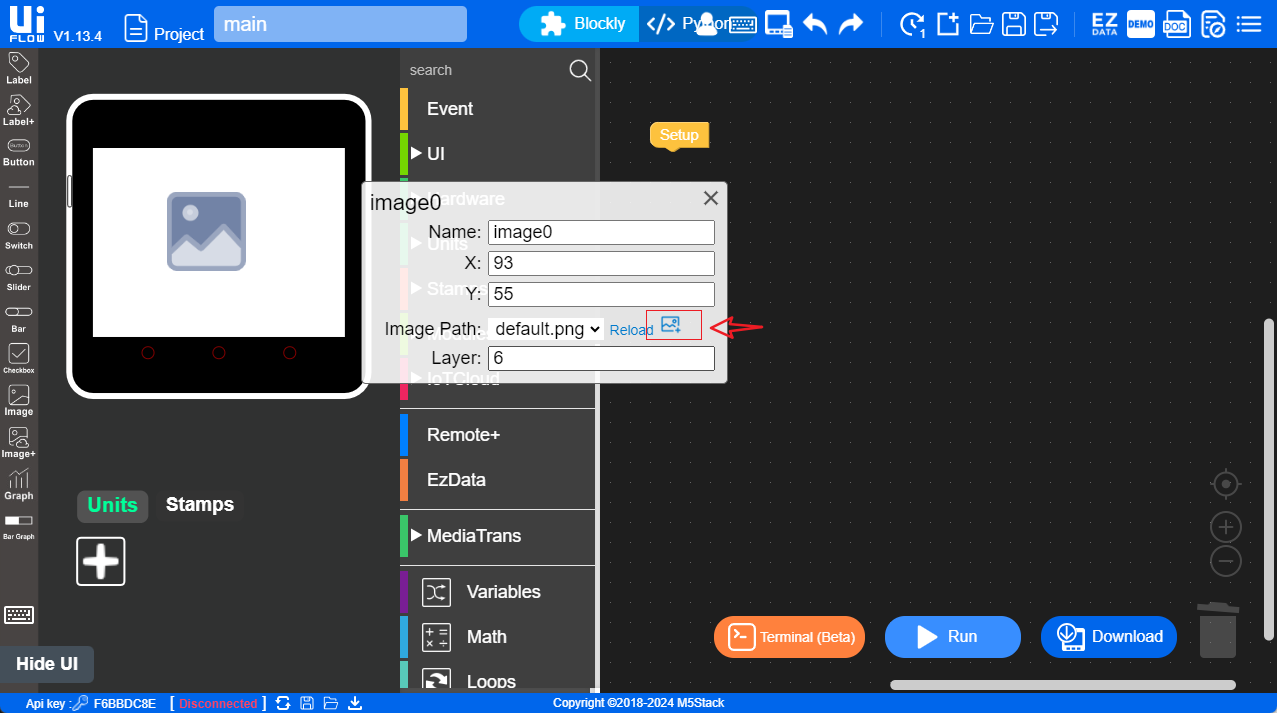
On the UI editing page, you can add image resources to the device by clicking the image add button. Additionally, with a network connection, the Web IDE supports online preview of images, and you can directly introduce them through code blocks.