Product Guide
Linux
LLM
Smart Home
M5Paper
IoT Tools
VAMeter
IoT Cloud
AWS IoT Core
Ethernet Camera
PoECAM
Wi-Fi Camera
Unit CAMS3
Ai Camera
LoRa & LoRaWAN
Motor Control
Develop Tools
Network
Easyloader
AWS IoT Core - Arduino
1. Overview
This tutorial demonstrates how to use M5Core2 as an example to connect a device to the AWS IoT Core platform via Arduino programming, enabling data subscription and publishing.
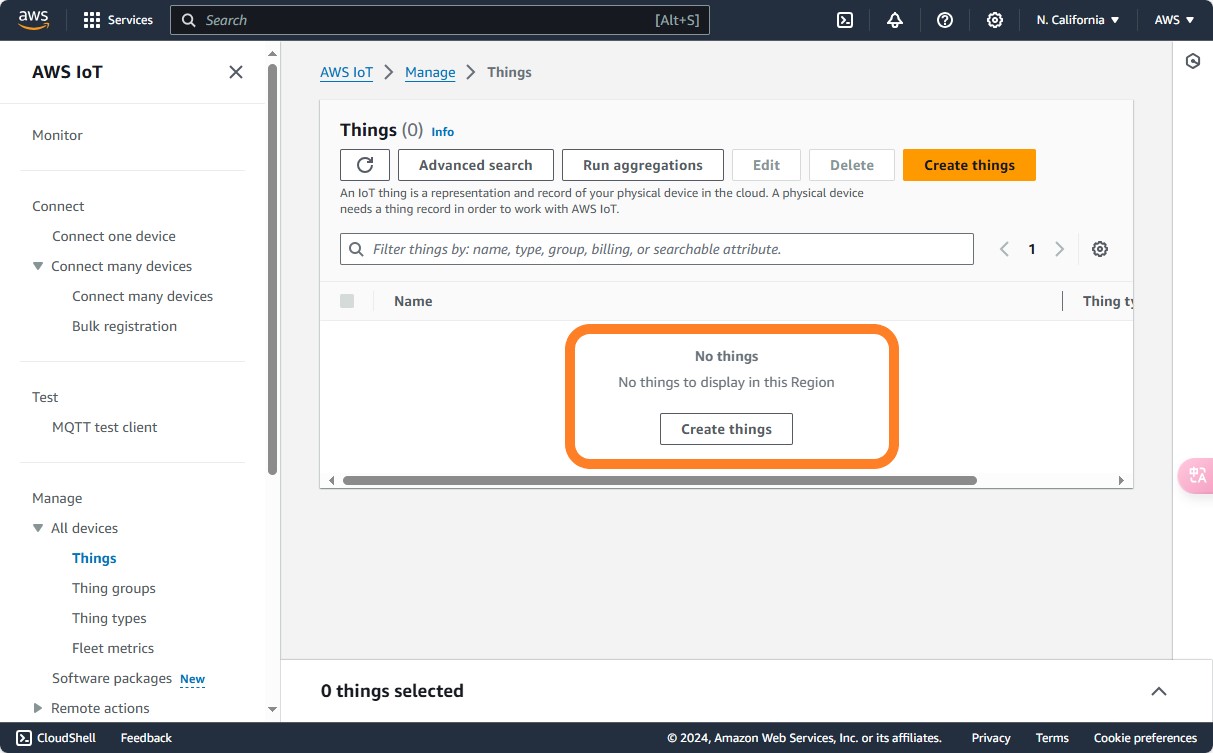
2. Creating a Device
Before connecting, you need to register a new device through the AWS Management Console. Click here to access the AWS Management Console . After creating an account, log in.
Follow the process below to create a device. For detailed instructions, refer to the AWS official documentation .

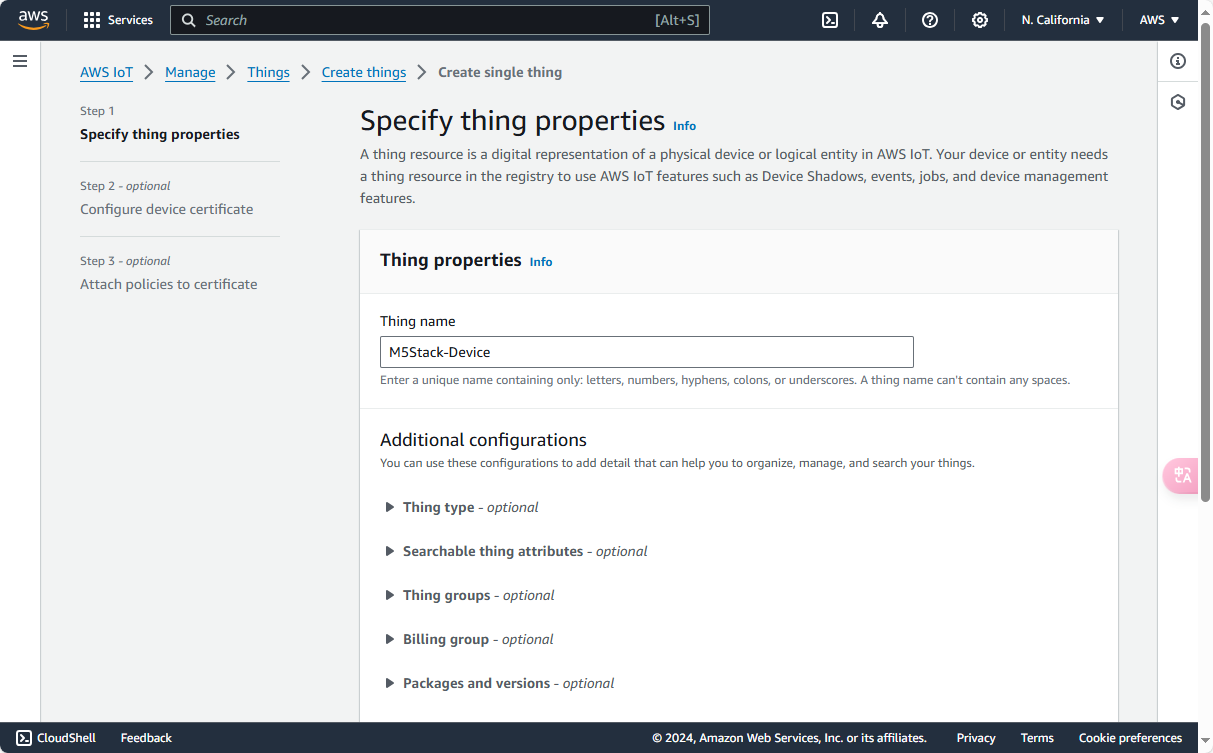
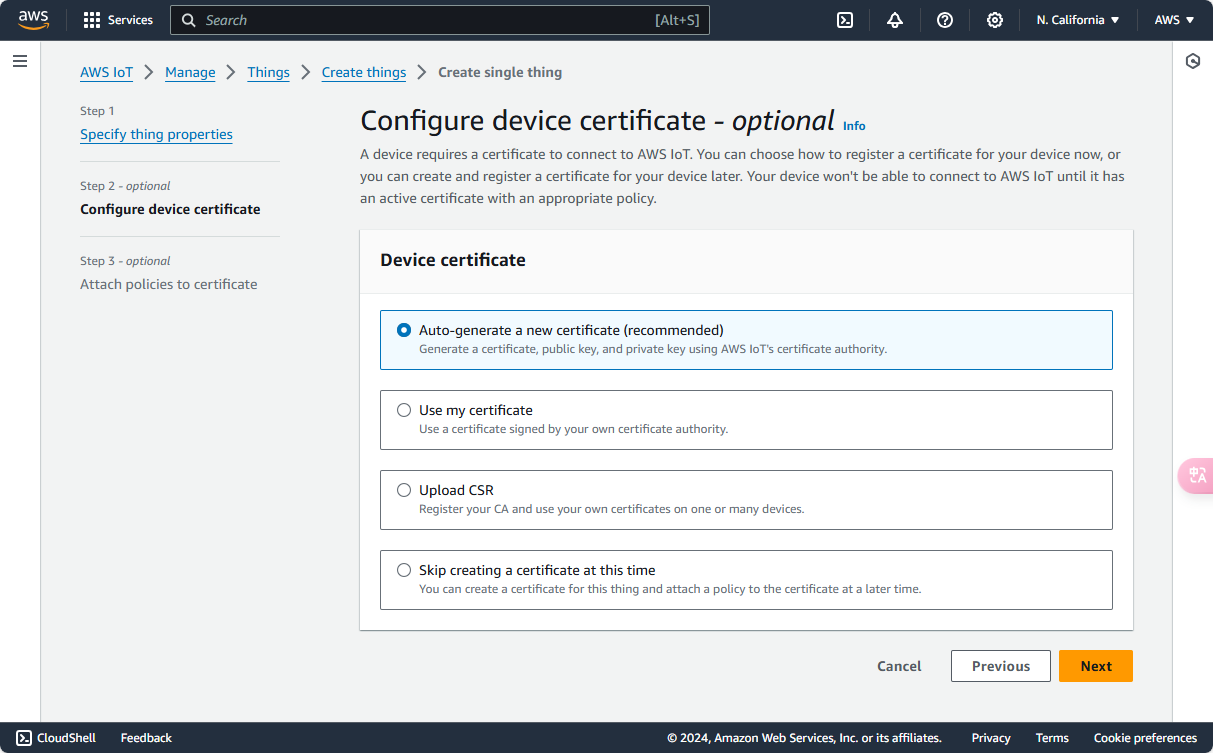
After creating the device, a page will pop up to download the keys and certificates. Follow the instructions to download all certificates locally for safekeeping. The Device Certificate, Private Key, and Amazon Root CA 1 certificates will be used for verification in later steps.


3. Installing Dependencies and Example Libraries
In this tutorial, we will use the M5Core2 touch button to control and publish data to AWS IoT Core. Before programming, we need to download the relevant AWS IoT dependencies and example programs from GitHub. You can download them directly using the git commands below (or click the links below to visit the corresponding project page and download the zip package, which needs to be extracted). Place the libraries in the Arduino library directory (usually located at C:/Users/YourUserName/Documents/Arduino/libraries).
git clone https://github.com/m5stack/M5Unified.git
git clone https://github.com/m5stack/M5GFX.git
git clone https://github.com/aws-samples/aws-iot-esp32-arduino-examples.git
git clone https://github.com/bblanchon/ArduinoJson.git
git clone https://github.com/256dpi/arduino-mqtt.git
4. Creating a Project
We can copy the basic-pubsub example program from the aws-iot-esp32-arduino-examples folder as a basic template for the project. The secrets.h file in the project will store the keys and certificates and Wi-Fi information.
THINGNAME as the name of the device we created, ensuring it matches the name in the AWS Management Console.2. Open the keys and certificates you obtained from the
AWS IoT Core device creation process in a text editor, then copy and paste their contents into the corresponding sections of the code.3. Copy the
Endpoint field from AWS Management Console -> Settings.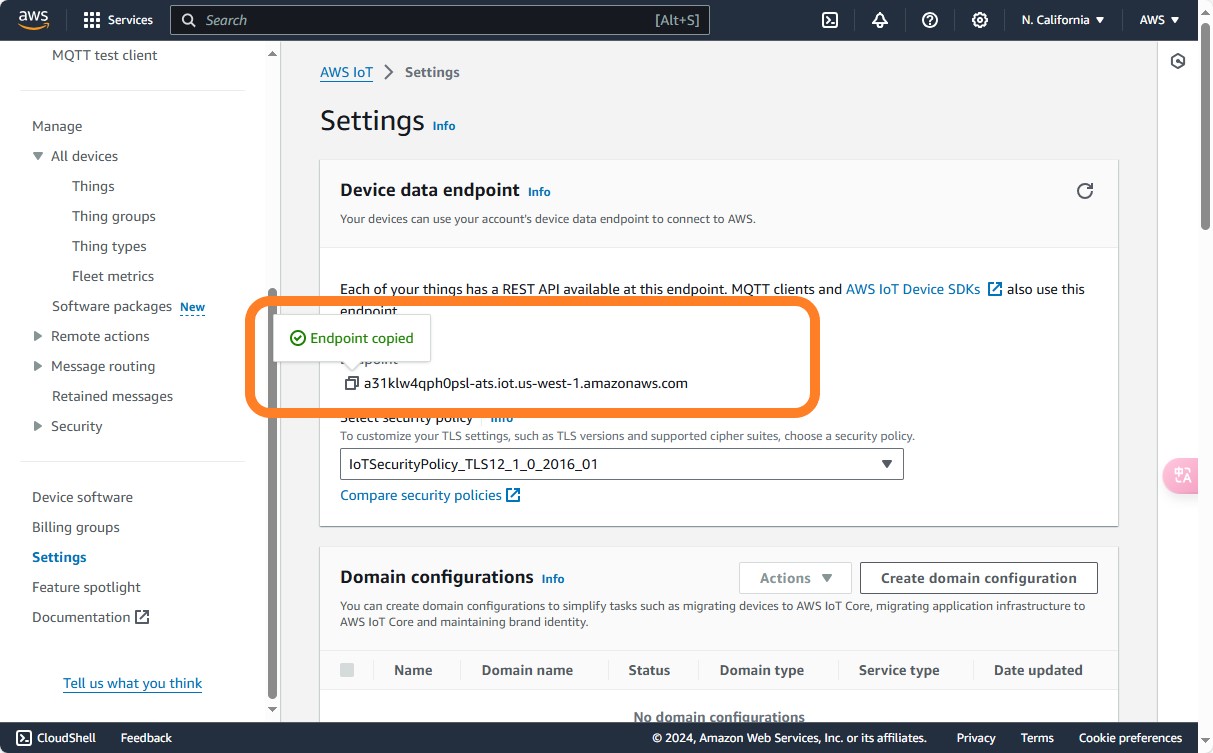
#include <pgmspace.h>

#define SECRET
#define THINGNAME "THINGNAME"

const char WIFI_SSID[] = "WIFI_SSID";
const char WIFI_PASSWORD[] = "WIFI_PASSWORD";
const char AWS_IOT_ENDPOINT[] = "xxxxx.amazonaws.com";

// Amazon Root CA 1
static const char AWS_CERT_CA[] PROGMEM = R"EOF(
-----BEGIN CERTIFICATE-----
MIIDQTCCAimgAwIBAgIT........................
-----END CERTIFICATE-----
)EOF";

// Device Certificate
static const char AWS_CERT_CRT[] PROGMEM = R"KEY(
-----BEGIN CERTIFICATE-----
MIIDWjCCAkKgAwIBAgIVA........................
-----END CERTIFICATE-----
)KEY";

// Device Private Key
static const char AWS_CERT_PRIVATE[] PROGMEM = R"KEY(
-----BEGIN RSA PRIVATE KEY-----
MIIEogIBAAKCAQEAq........................
-----END RSA PRIVATE KEY-----
)KEY";
5. Editing the Program
Refer to the program below, compile it using Arduino IDE, and upload it to the device. After uploading, pressing touch button A will publish data to AWS IoT Core. Incoming downlink data will also be displayed.
#include <M5Unified.h>

#include "secrets.h"
#include <WiFiClientSecure.h>
#include <MQTTClient.h>
#include <ArduinoJson.h>
#include "WiFi.h"

// The MQTT topics that this device should publish/subscribe
#define AWS_IOT_PUBLISH_TOPIC   "esp32/pub"
#define AWS_IOT_SUBSCRIBE_TOPIC "esp32/sub"

WiFiClientSecure net = WiFiClientSecure();
MQTTClient client    = MQTTClient(256);

void messageHandler(String &topic, String &payload) {
    Serial.println("incoming: " + topic + " - " + payload);

    StaticJsonDocument<200> doc;
    deserializeJson(doc, payload);
    const char *message = doc["message"];
    M5.Lcd.clear();
    M5.Lcd.setCursor(0, 0, 2);
    M5.Lcd.setTextColor(TFT_BLUE);
    M5.Lcd.setTextFont(2);
    M5.Lcd.println(payload);
}

void connectAWS() {
    WiFi.mode(WIFI_STA);
    WiFi.begin(WIFI_SSID, WIFI_PASSWORD);
    Serial.println("Connecting to Wi-Fi");
    while (WiFi.status() != WL_CONNECTED) {
        delay(500);
        Serial.print(".");
    }
    // Configure WiFiClientSecure to use the AWS IoT device credentials
    net.setCACert(AWS_CERT_CA);
    net.setCertificate(AWS_CERT_CRT);
    net.setPrivateKey(AWS_CERT_PRIVATE);
    // Connect to the MQTT broker on the AWS endpoint we defined earlier
    client.begin(AWS_IOT_ENDPOINT, 8883, net);
    // Create a message handler
    client.onMessage(messageHandler);
    Serial.print("Connecting to AWS IOT");
    while (!client.connect(THINGNAME)) {
        Serial.print(".");
        delay(100);
    }
    if (!client.connected()) {
        Serial.println("AWS IoT Timeout!");
        return;
    }
    // Subscribe to a topic
    client.subscribe(AWS_IOT_SUBSCRIBE_TOPIC);
    Serial.println("AWS IoT Connected!");
    M5.Lcd.println("AWS IoT Connected!");
}

void publishMessage() {
    StaticJsonDocument<200> doc;
    doc["time"]    = millis();
    doc["message"] = "Hello World";
    char jsonBuffer[512];
    serializeJson(doc, jsonBuffer);  // print to client

    client.publish(AWS_IOT_PUBLISH_TOPIC, jsonBuffer);
}

void setup() {
    M5.begin();
}

void loop() {
    M5.update();
    if (M5.BtnA.wasClicked()) {
        Serial.println("Button pressed");
        publishMessage();
        Serial.println("Publishing");
    }
    client.loop();
}
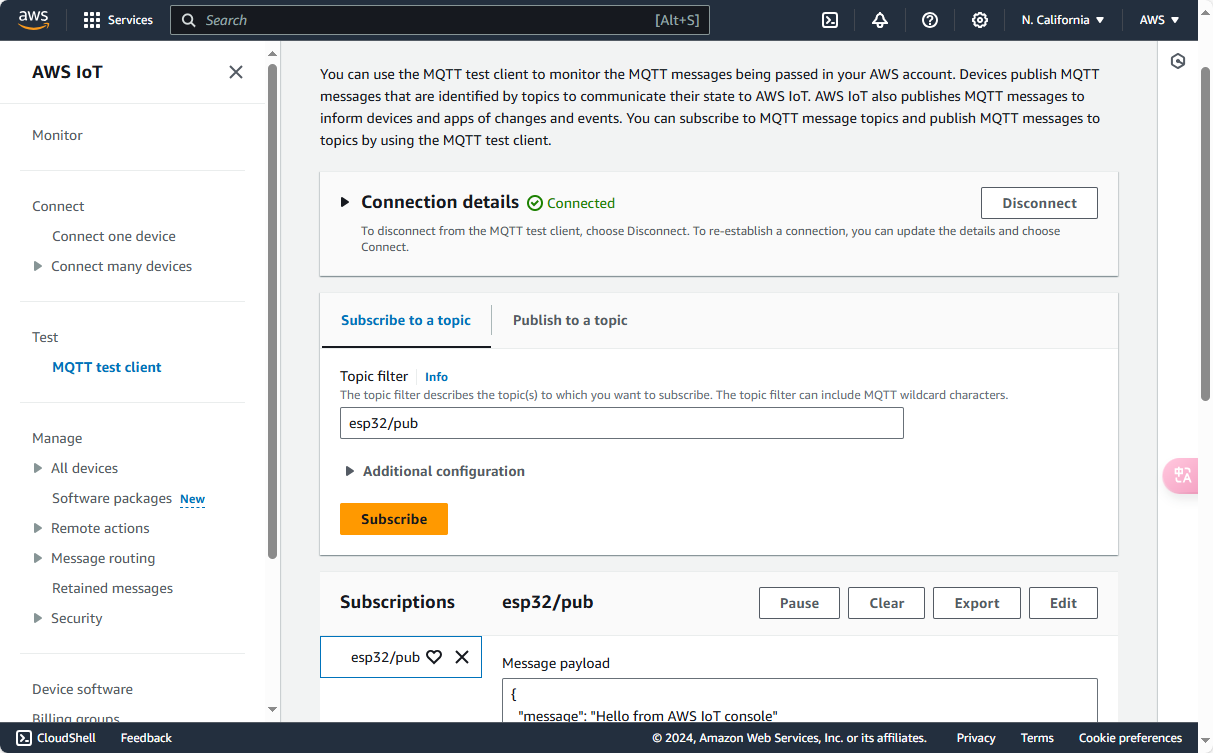
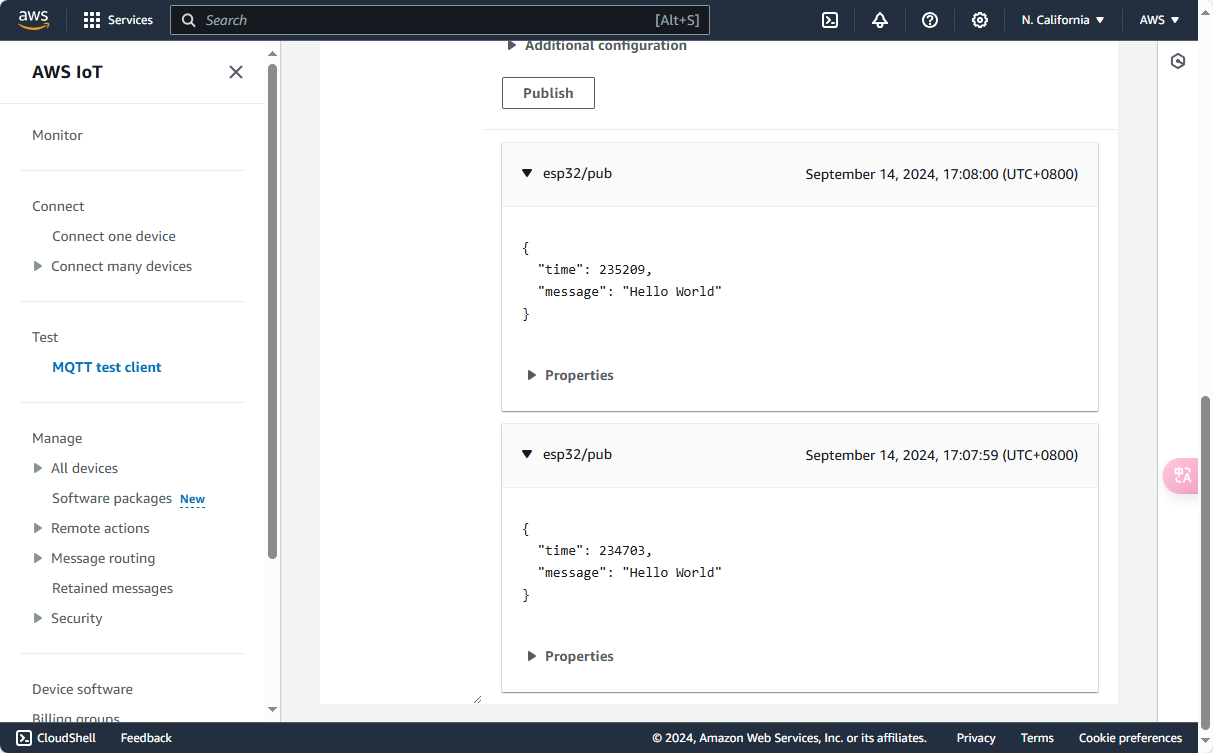
6. Online Debugging
Go to AWS Management Console -> Test to access the online test page. This function is used to test MQTT messages from devices in the AWS account. Click on Additional configuration to adjust the QoS level.
- Publish Topic: Enter the Topic and Message payload, then click Publish.
- Subscribe Topic: Enter the Topic and click Subscribe. In Additional configuration, you can set the message type. Received messages will be displayed in the console below.