How to deploy M5Unified using Visual Studio Code
We will summarize the steps to build a program using M5Unified using Visual Studio Code (hereinafter VSCode) and its extension Platform IO.
You can follow the steps.
The versions at the time of writing this document are as follows.
- Windows : Windows 11 Home 22H2
- VSCode : 1.70.2
- PlatformIO : 3.1.1
- M5Unified : 0.1.6
Environment construction
1.VSCode Download & Install
VSCode download page Then, specify the OS and download the VSCode installer.
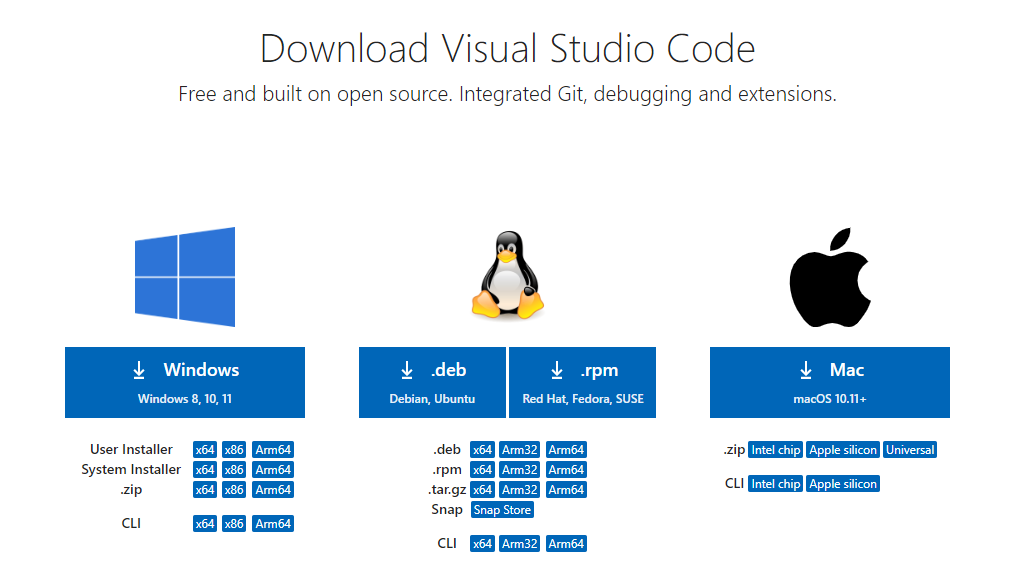 - Once the download is complete, run the installer and install VSCode.
2.Installing Platform IO
When VSCode is started, it is an extension for building a compilation environment for embedded development Platform IO Install .
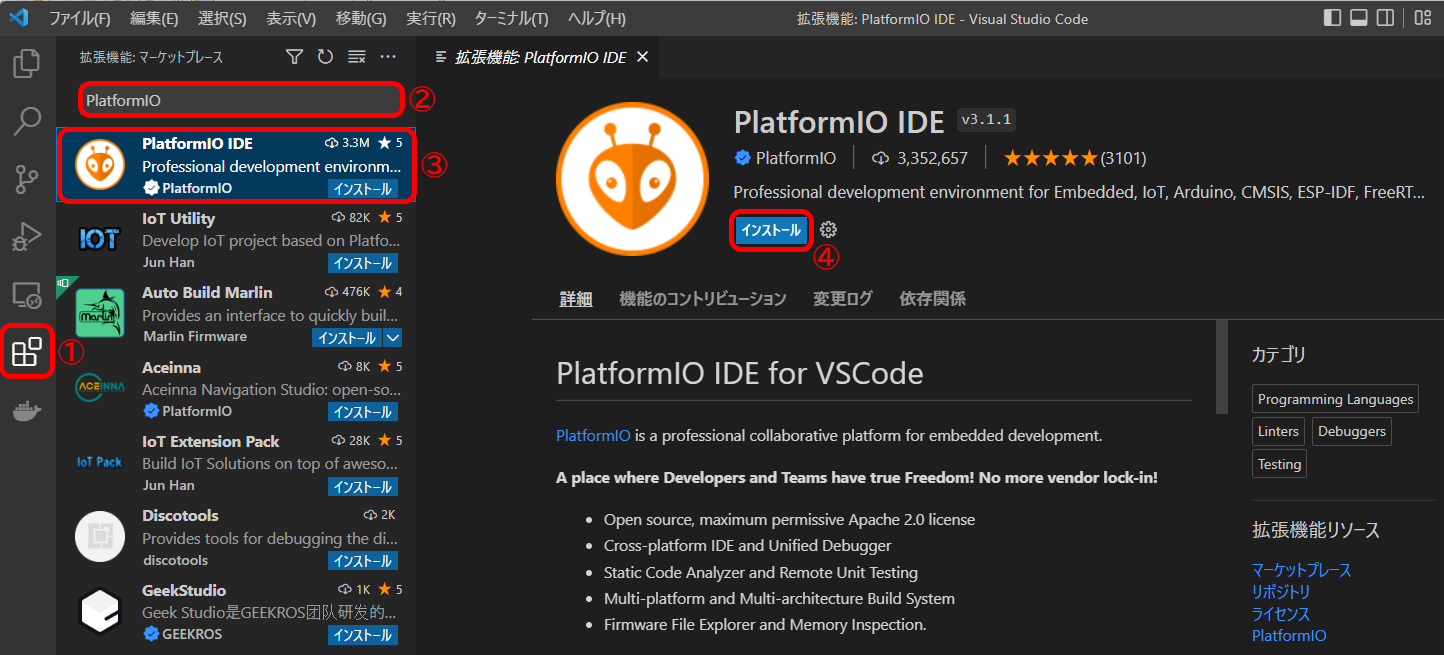
- ①Click "Extensions" in the leftmost activity bar.
- ②In the search text box, type "PlatformIO".
- ③Click "PlatformIO IDE" in the search results.
- ④Click the Install button in the "PlatformIO IDE".
Project Creation Build
1.Project Creation
After installing VSCode and Platform IO, create a project.
 - ① Click "PlatformIO" in the leftmost activity bar.
- ② Click "Create New Project".
- ③ Click "New Project" in the PIOHome tab.
2.Filling out the project wizard
When the Project Wizard appears, enter each item.
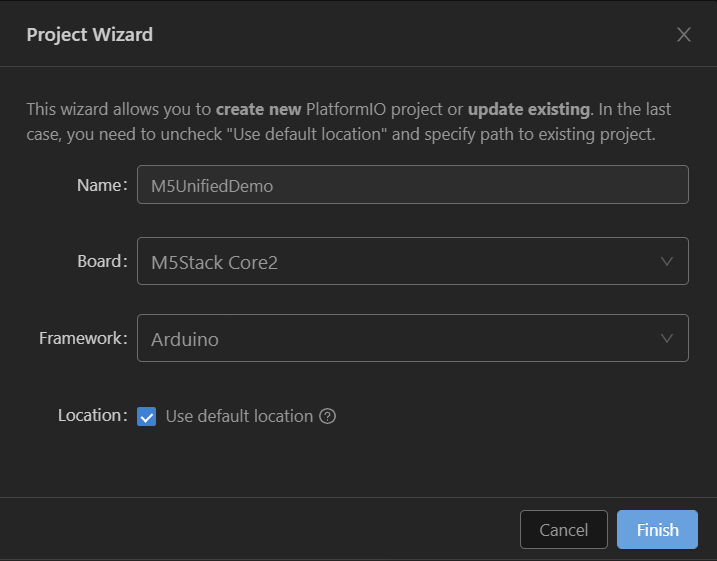
Name : Enter a project name.
Board : Select the board on which you want to write the program. (e.g. M5Stack Core2, M5Stack AtomS3, etc.)
Framework : Select Arduino.
Once entered, click "Finish".
3. Add a library to a project
Add the M5Stack library "M5Unified", which is the purpose introduced this time, to the project.
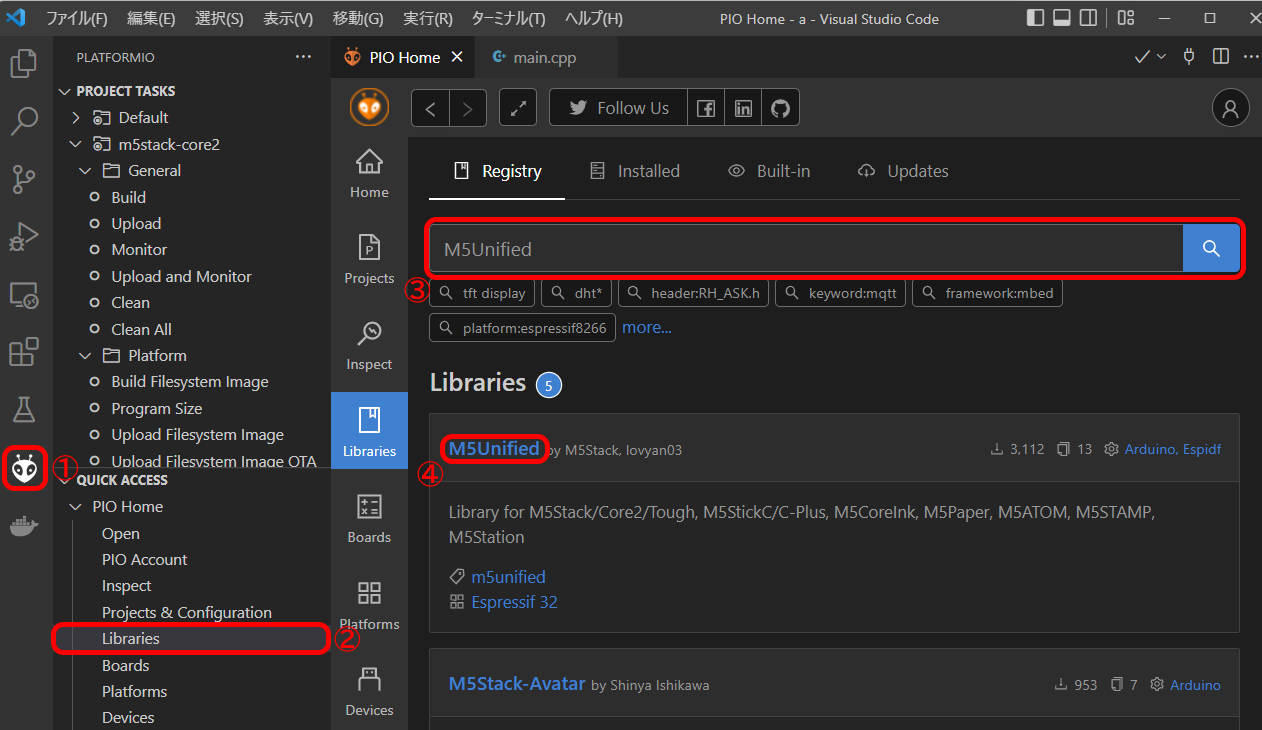
- ① Click "PlatformIO" in the leftmost activity bar.
- ② Click "Libraries".
- ③ In the Library Search text box, type "M5Unified".
- ④ Click "M5Unified" in the search results.
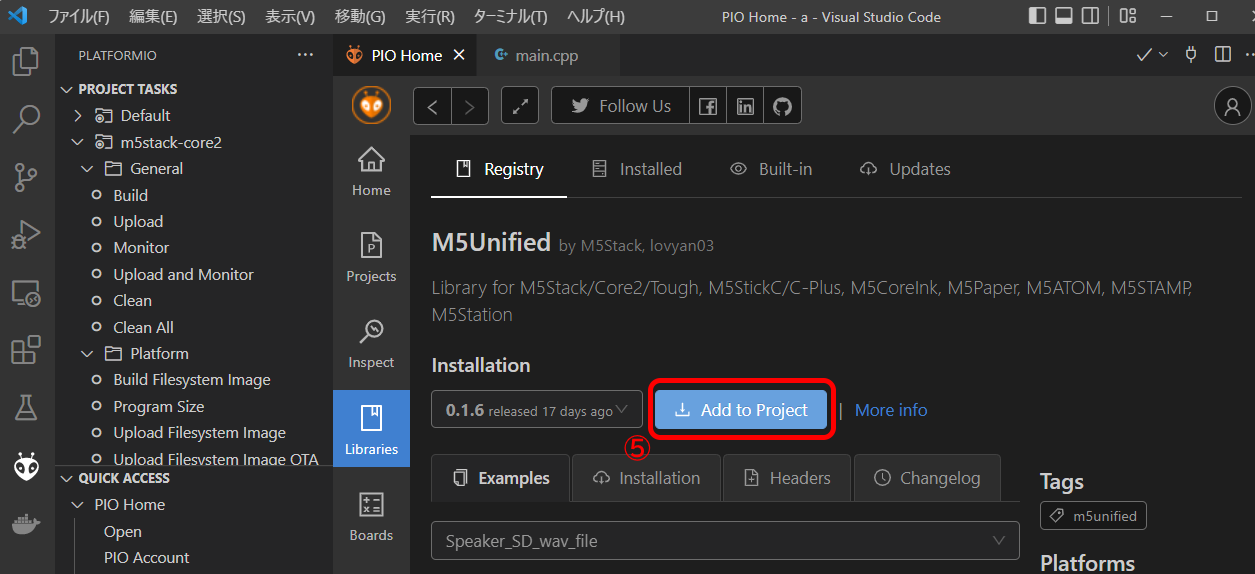
- ⑤ When M5Unified by M5Stack, lovyan03 appears, click "Add to Project".
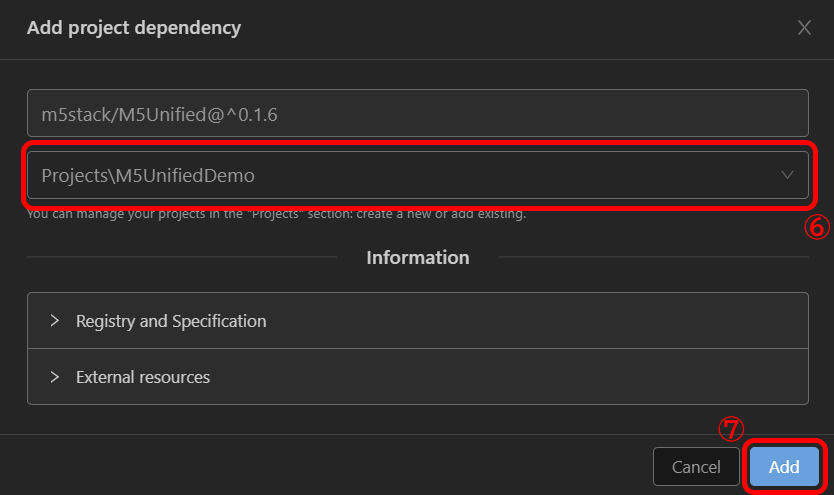
- ⑥ Select the project you created in "Section 2. Input the Project Wizard".
- ⑦ Click "Add".
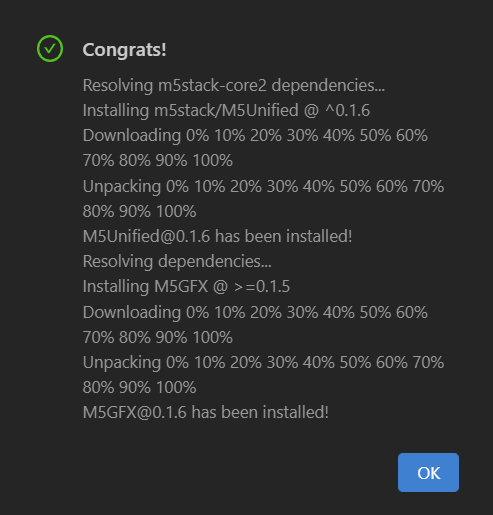
When the installation is completed successfully, the "Congrats" dialog will be displayed like this,
The library is added to the project.
4.Build the program
Build the sample program and write it to M5Stack.
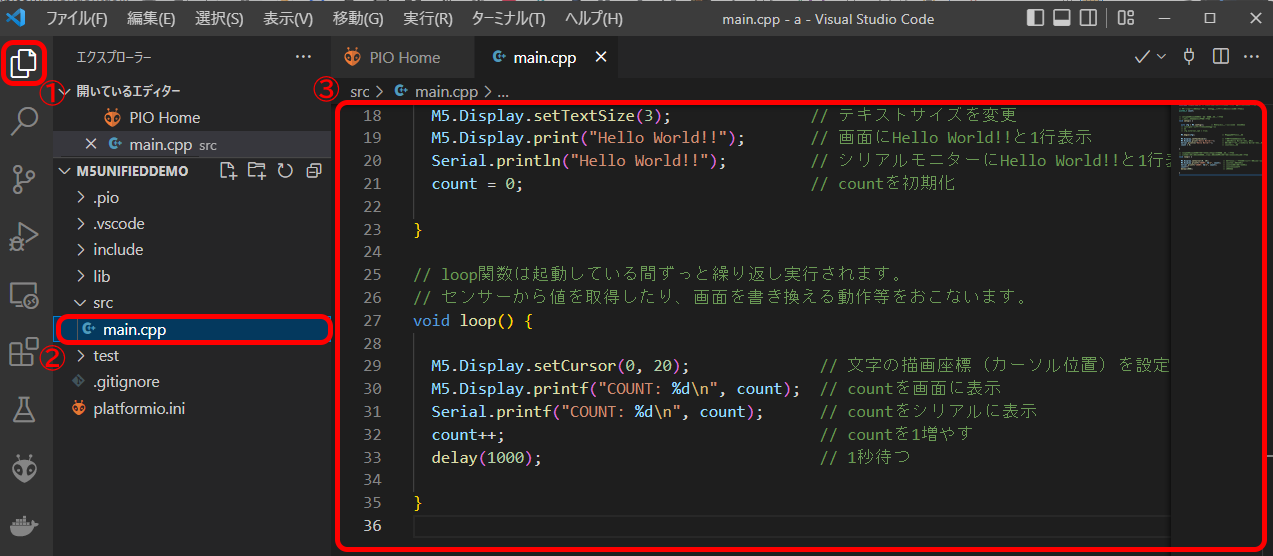
- ① Click Explorer in the leftmost activity bar.
- ② Click "src/main.cpp"。
- ③ Entering the Program Source Copy and paste the source code※
※When using M5Stack without a screen,
「3. Add a library to a project」、add 「FastLED」to a project。

After that, click (1) to build, or (2) to write a program to Build + M5Stack.
If successful, "Success" will be displayed on the terminal as shown in (3).
That's all for how to install M5Unified using Visual Studio Code.
If you have any problems, please report them to Issues with instructions.
Thank you for your hard work!
